Amazing Wildlife Video

Most Recent Images

Art Prints

How To Photograph Waterfalls and River Rapids


Shoshone Falls - Twin Falls, Idaho

How to photograph any waterfalls like the professional photographers do? I'm going to tell you this secrets in step by step so that you could get the picture you have been dreaming of ever since you got your camera.

There are exactly  two ways to photograph any waterfalls. The 'Easy Way' and the 'Artistic Way'. Well, the so called 'Easy Way' also involve a lot of your artistic talents but it just require a little bit of less effort than the other way.

Lets do the easy way first before we learn the more complex one. This is for everyone with a camera. I know, you can just walk into a fall, frame it, and press the shutter release button. Now you look at the picture on that tiny display and you are not quite satisfied. So here comes a little bit of artistic talent. Before you rush to the fall to click that selfie, lets walk around and study the magnificent waterfalls from your eyes while your camera or the phone camera still stay in the bag. While you walk, look for the best possible view with least amount of obstruction. Yes, waterfalls are tourist attraction. You will find lots of photographers walking around with their own cameras. You don't want all of them in your frame, unless they are adding value to your picture. Also make sure the light is not too harsh, usually early morning or late evening are the best time unless the falls is in shed.

Once you find your spot, with a clear view of the fall, compose your frame keeping the waterfall as your primary focal point. Keep the shutter speed above 1/125, aperture between f8-f11 and ISO in auto. I would prefer matrix or center weighted metering, but if you are not sure bracket your exposure for 3(1EV) or 5(0.5EV) shots depending on light condition. Now press the shutter release for your test shots and review your pictures, recompose & retake after adjusting exposure until your are satisfied. 

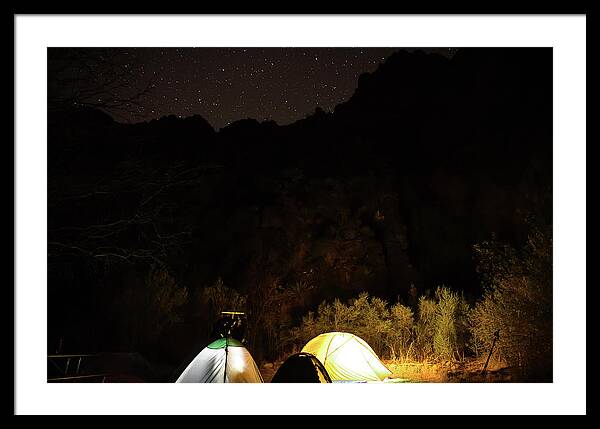
I took several shots of this falls in Easy Way, liked this one best.


Now let's do the other way where you need to spend considerable time planning for your shots. I will start with the list of gadgets you would need.

Gadget List:

  1. A camera with manual control
  2. Wide angel lens, a 24-70mm zoom works best.
  3. Sturdy tripod with ball head
  4. L-bracket for your camera ( easy to change orientation from landscapes to portrait )
  5. ND Filter ( nd4 - nd32), Circular Polarizer filter
  6. Electronic Cable Release
  7. Rain Cover for Camera & Lens
Once you have the gear ( First 3 are mandatory, rest are optional ), you need to research about the falls you want to photograph. This research is like the walk around the falls I suggested previously. You would be taking a long exposure shot. So you definitely need to find a spot where you won't be bothered in the middle of your shot. Trust me, there is always that one person who loves walking in front of your camera while your shot is in progress. Check out the following list.
  • Best time of the day when the fall is evenly illuminated 
  • Best viewing spot for the fall
  • Some space near best viewing spot where you can setup your tripod, make sure no one can walk in front of it.
  • Wind direction / mist from the waterfall. If you are getting mist, you need to put your camera inside the rain gear. 

Setting Up for the Shot:

  1. Arrive early to your previously researched spot and start preparing for the shot.
  2. Setup your tripod. Make sure all 3 legs are on firm support. Then level the tripod. Most tripod comes with bubble leveler that you can use.
  3. Attach electronic cable release into the camera. You will release the shutter remotely to avoid vibration.
  4. If the place has mist from the fall, put the camera inside the rain gear and then attach to the tripod head. Adjust the tripod head to level the camera as again.
  5. Compose your images the way you want it. Every photographers wants it in their own way. So you got to decide what you want in the frame and what must  be excluded. Anything that cause destruction should be excluded which anything that add values can be included.
  6.  If you can shoot the whole fall, make sure there are more room in the bottom where the water crashes. Usually there is not much interest at the top unless you can show the trail of water source.
  7. Set your camera in Aperture priority and set the F number between f8-f11 depending on the light. Set the ISO to the camera native ISO ( usually it is 64 or 100). Now take few test shot with this setup. Recompose your frame until you get exactly what you are looking for. Remember, you can crop latter to exclude unwanted subjects, but you can't get something back in your frame if you exclude it while shooting.
  8. Now we are going to full manual mode. Turn the auto focus off once you locked the focus from previous step. Also, turn the exposure mode to manual as well. Set the shutter speed to 2 secs, ISO to native and Aperture to f11. Now, press the shutter release button half and verify if the exposure is correct. Your camera should indicate if you are over/under/rightly exposing the frame. If you are overexposing by maximum 1 stop, attach the circular polarizer. You can adjust the polarizer to neutralize reflection from shiny objects. Attach the ND filter ( start with ND4 and go higher if needed) if you are still overexposing. If water speed is very fast, you may reduce shutter speed to 1 sec.
  9. Take your first shot when camera meter says your exposure is right. Now review the image you just shot, make sure you are not over exposing any part. The best way to check this is to look at the histogram and make sure no clipping tower. A slightly underexpose image can be recovered in post processing, but overexpose image is very hard to recover if not impossible.
  10. Adjust the ISO / Aperture / ND filter to get the correct exposure. You can't reduce shutter speed lesser than 1 secs as you won't get the silky smooth finish that gives the impression of motion in the water. 
  11. If you are underexposing, don't go more that 3 secs with the shutter speed.  Anything beyond 3 secs will give you an impression of spilled milk. So open the aperture or increase the ISO if you are already at max aperture.
Press the shutter release button in the remote and review your shots after each take. Adjust, recompose and retake if necessary. Never leave the place without reviewing your image. You don't want to go home and discover you had your lens cap on all the time. Sooner you discover any problem, faster you can solve it while you still have the opportunity to get the best shot.


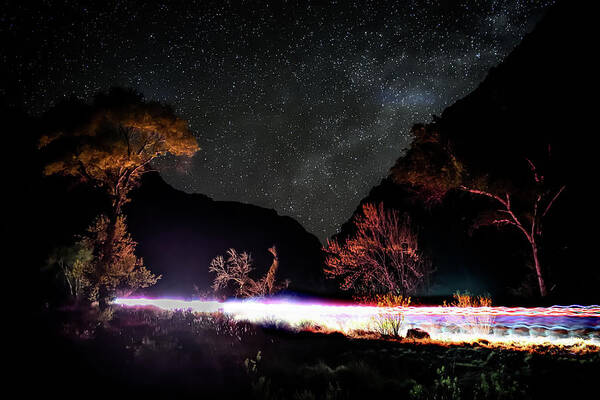
Vernal Falls at Yosemite, shot from Mist Trail.


River Rapids:

While photographing river rapids, the techniques are similar except the composition part. You already know how you can get a silky smooth flow pattern for  the water. However, the merit of your image will depend on what else you keep around the water. This is where your artistic mind play a BIG role. There is no law or guidelines for this. Compose the way your eyes want to see it and good luck.

Don't hesitate to go down near the water, as long as you can do it safely to get the best perspectives for your shot. Try different angles and then keep the best one.

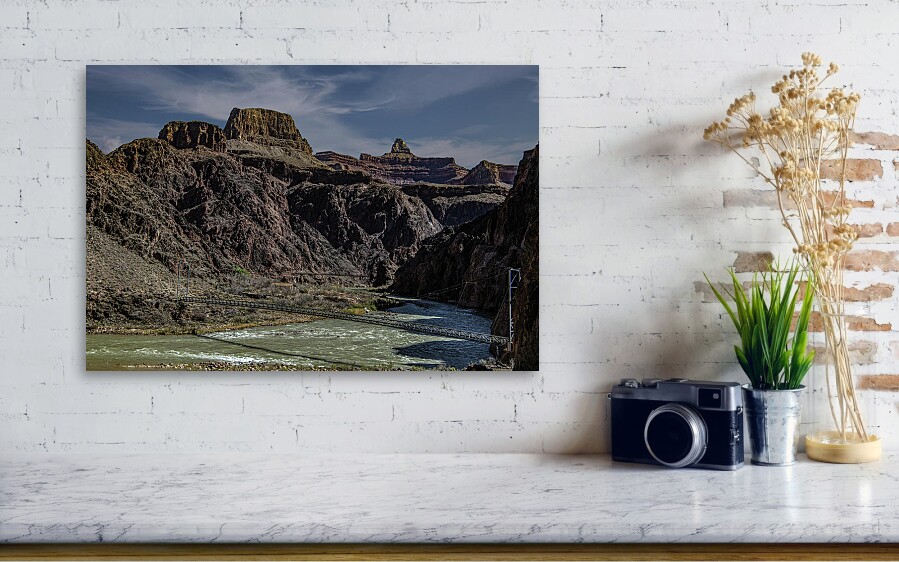
Merced River, Yosemite National Park


More images of Waterfalls and River Rapids are available in my Fine Art America Pixels Store  where you can order a print if you would like to.

Print Ordering Catalog

Your order will be processed and fulfilled by Fine Art America. Your satisfaction is guaranteed or money back as per Fine Art America Return Policy 


Photographing Alaska Brown Bears

Alaska Brown Bear Fishing at Brooks Falls

Brown Bear or Grizzly is one of the top most predator in the wild and Alaska is one of their homes.  They live mostly in the coastal regions of southern Alaska. 

There are many places to photograph these Grizzlies. However, if you talk about getting them in action, Brooks Falls is the only place that comes in my mind. And there is a small window of time in each year when you get them. The bears come to the falls when the annual salmon runs in it's peak. That's obviously in the month of July.  By the end of July, the bears would be gone. They do return in smaller numbers in September for the leftover near dead salmons still floating around the river. 

How to Get There: 

Brooks Falls is remote, at the heart of Katmai National Park. There are options to stay in Brooks Lodge or Brooks Camps, both located closed to the falls. You need to be really lucky to get a spot in either of those places, usually sold out two years ahead of time. You can't stay in the park if you don't have a reservation in the lodge or campsite.

The other options are staying in Anchorage or King Salmon and take Day Trip in Float Plane. This obviously rules out that golden hour photographer's fantasy but trust me, you won't miss much. The weather is often overcast in this area, so the light would still be good enough, if not the best. King Salmon ( it's a city, not the fish ) is very close to the Brooks Falls, just outside Katmai National Park but there are limited number of hotels and they do get sold out. Besides, making the base in Anchorage would be more economical and convenient as well.


My Trip Details:

I've been planning to photograph the bears since 2016. I started to gather information in bits or pieces from whatever sources I could. Sure the internet is our best friend in this information age. But I needed to find some reliable information while I also worked on the right gears I would need for this photoshoot. It was only recently during my interaction with Brooks Lodge reservation office I came to know that the bear population in Brooks Falls is highest in July, especially in mid-July. 
I live in San Francisco Bay area which has 3 main airports i.e. San Francisco, Oakland, and San Jose.  But only Alaska Airline flies directly to Anchorage from San Francisco.  I wanted a direct flight and that was my only option. Unfortunately, there was no direct return, I had to change in Seattle.
For camera gear, I needed something that can shoot fast action. I needed a camera with high fps rate and fast glass. So I paired my Nikon D6 with Nikon 400mm F/2.8E as my primary gear. For the back up, I paired Nikon D850 with Nikon 200-500 f/5.6E. I also put a 3rd lens i.e. Nikon 24-70mm f/2.8E in my bag. This was for the aerial photography of Alaskan Landscape while flying from Anchorage to Brooks Falls. I did carry extra batteries & memory cards, a tripod with gimbal head, and a lens pen.
Rust Flying Service,  my float plane operator picked me up from hotel at 8:30am. It was a short drive to their port. We checked in and then watched their crew getting the planes ready for the trip. You have to weigh you bags and yourself as a part of their check-in process. Soon we were on board and flying south along the coast.


Anchorage Landscapes - Knik Arm

The flight duration is approximately 1 hour 45 minutes but your adventure with camera would start as soon as you are off the ground. This is a small plane flying low approximately at 5000'. So you get to photograph all those amazing landscapes and glaciers. So use a wide angle lens and keep fast shutter speed to avoid monition blur. Also it may be a good idea to use auto exposure bracketing feature of your camera.  I used manual exposure (1/500, f8) with auto ISO and 3 stop bracketing ( 0, -1, + 1 EV). 


Iliamna lake

The plane will land at Naknek Lake near the Brooks Lodge and everyone is required to attend 15 minutes ranger's talk.  You got to store your food in the Food Storage room and can only eat in a designated area where you would be attending the ranger's talk. It's all about safety protocol, as there are bears almost everywhere in the park.  I suggest you eat your lunch after the Ranger's Talk and before you head toward the Falls. I took out my main camera and mounted on the tripod before starting my hike towards the falls. The fall is about 2 miles from the lodge. First you cross the river which is now free of Bear Jam ( The Park service got wiser ). There would be lot of things happening around the bridge.


Bear at Brooks River - Shot near the Bridge

There would be Rangers on the boardwalk near the falls. In July, the crowd is bigger and so they limit viewing time to 30 minutes per person on the main viewing platform. You got to put your name in the list and head towards the secondary platform on the right side.  The ranger will find you when your turn comes, as long as you are in the secondary platform. However, if you leave the boardwalk and miss your turn, you will have to start over again.
The secondary platform is also fantastic if you have long lens. You can see the falls and there are plenty of bears fishing down the river as well. 


The Grizzly Devouring the Salmon Near Brooks Fall, Secondary Viewing Platform

It was an amazing view as I took my first glance at the falls from the secondary viewing platform.  I've never seen so many bears in action at once.  There is one little caveat for photographers i.e. the tripod legs can't be spread due to space limitation, so a monopod is more suitable on the viewing platform. So I had to  use my tripod as monopod only while shooting from the platform. 
As I was busy looking around all those grizzlies in the river, a beautiful lady whisper in my ear, 'there is a momma grizzly sleeping with her two cubs under the platform'. I wouldn't miss that for anything else. But they were closer that the minimum focusing distance of either of my telephoto lens. I was really lazy to change my camera lens at that moment. So I shot this photo with my iPhone.


Momma Grizzly & Her Two Cubs - Just Woke up from a Nap

 As I shifted my attention to the river, I found this Grizzly had just caught this huge salmon and then rushed to safeguard it from the seagull.

Seagull often tries to steal a bite or two from the bear


Never noticed how the time flew as I heard the Ranger calling my name. Then it was my turn to see them up & close from the main viewing platform. However, it was not easy to find a spot appropriate for shooting photo with a large camera. Everyone is busy shooting selfie with their cellphones. There were people pushing around for a selfie spot. I surveyed the platform and narrowed down to a spot where I wanted to be. I then lined up behind those who were already occupying that area. After several minutes, I got a spot next to my targeted spot. I then traded my spot with the person who was at my targeted spot. He was really nice when he saw my huge camera gears.
There were many  bears below the falls but only few at the top of it. Those are prime spot and only big bears get to fish from those spot. Yes, they do have rules or they have to fight to fish from prime spots.


Two for Two

Sometime it does not go as planned for the Bears too. As the fish leaped, the grizzly opened his jaws to catch it in mid-air but he missed. The hit was straight onto his snout. I guess it was a big ouch!! but the fish lived for a bit longer I guess.

A Bear getting hit on nose my a Salmon

 This is an amazing scene where the fish flies straight into the jaws of one bear while the other one is sad and salivating.

Look at the other bear - he is sad and salivating

A mother's love never gets old. The almost adult cub rush to her as soon as she caught the fish. Momma Bear let the cub bite from it while she held it firmly in her claws.

Momma and Cub

Before I knew it, my time was up at the platform. But I was satisfied with whatever I got. I happily left my spot as soon as the Ranger called.  I headed towards Lake Brooks which was about another mile on the right. There was no bears in the lake, but it's a beautiful lake anyway. I saw few houses around the lake. The park service employees live there. They have 'keep quit' board.

Lake Brooks

It was time to return and report to the pilot. I stopped on the bridge to take a closer look at what was under water. There were fish everywhere. 

Fish Swimming in Brooks River

Then it was time to head back to Anchorage. Our pilot flew the plane really low and narrated every glaciers we crossed. We also saw several Beluga Whales flipping their back on the ocean surface.

The next day I went to see glaciers at Whittier and here is a photo of the biggest glacier at 'Prince Willian Sound'

The Harvard Glacier - College Fjord


The whole Alaska photo collection is available here: Alaska Photo 2021

Promotion: 

  • Framed art prints All of these photos are offered for print from my store at Fine Art America 

  • Every purchase comes with a 30-day money-back guarantee. 

  • The 'Fine Art America' watermark will not appear in the final print. 
  • The pricing has two component that include 'Base Price' and 'Markup or Artist's Commission'
  • Base price is charged by 'Fine Art America', it includes printing & handling cost. They do offer discount on that from time to time, specially near holiday season. I've no control over base price.
  • The 'Markup' is my commission and I've full control over it. As a token to my reader, you can use coupon code 'PELXJY' at checkout for 25% discount on my markup.
  • If you enjoyed my blog, please subscribe and share.

Contact ME

Name

Email *

Message *